Slide Guitar

Around New Year, I was at the Whare Flat folk festival in Dunedin; my second time around.

http://www.whareflat.org.nz/

I attended a few workshops: Bluegrass Jam, Old-time Music Jam, and one about slide guitar.

Tony Burt let me use his own personal resonator guitar, and I had great fun.

https://www.tonyburt-creative.com

So, I’ve ordered Yet Another Guitar – a Gretsch G9210 Boxcar Square Neck Resonator. I wish I could afford a real Dobro, but as I am just getting my feet wet, the Gretsch will most certainly do.

I did not know, but it turns out there are multiple types of slide guitar: some are played like regular guitars, some are played while they lie on the lap.

The ‘regular’ ones have a round neck, and the strings are not too high above the frets, so you can either fret them normally with your fingers, or use a slide or bottleneck around your finger to play them.

The ‘square neck’ ones are the ones you hold flat on your lap. There the strings are much higher above the frets: the frets only serve as an indication of where the tone lies, and you use a steel slider to change the tone.

These guitars are often tuned in all kinds of tunings; when I played Tony’s guitar, it was tuned G D B G D B.

I love the totally different sound coming from these guitars. Hope I manage to learn to play it properly.

Getting off Facebook

Welcome to my blog!

I finally bit the bullet, and decided to get off Facebook.

I weighed up the pros and cons, and in the end, the cons weighed heavier.

Despite being about ‘getting people together’, I think that in the end, Facebook is more about splitting people apart than about getting people together.

I’ve seen former friends become really angry at one another and never talk to each other again because Facebook is fanning the flames of discord. I cannot help but think of ‘Radio Mille Collines’.

Staying in touch with family and friends and things like community groups on Facebook serve a purpose, but that’s not enough to turn a blind eye to the harmful side of Facebook.

So, instead of Facebook, I’ll be here, on this blog!

I am also still on Flickr:

https://www.flickr.com/photos/zwettemaan

If you’re so inclined, you can send me a friend request – by default, no personal pictures are shown, but friends and family can see personal pictures too.

On Instagram:

https://www.instagram.com/kriscoppieters

On Twitter:

https://twitter.com/zwettemaan
https://twitter.com/k_coppieters

You can also leave comments on this blog, or email me at

kris <AT> coppieters.nz

However, I want to share you the story why I have a beard.

When I started to develop my first wispy hairs on my chin, I decided that I was never going to shave. Assuming a man needs 5 minutes each day to shave, and assuming I was going to live to 72, I was going to save (72 – 17) * 365.25 * 5 = 100443.75 minutes = 70 days of my life.

The story has a sad ending: I think I wasted all my gains on social media 🙁

So, come back occasionally. My blog will mostly be terribly boring, but there might be some interesting nuggets here and there.

Final word: I would like to ask everyone who read this far to try and avoid using the word ‘they’, or at least, be aware of it when you’re using it.

You’ll notice lately there is a steep incline in its usage: ‘They do this’, ‘They all believe that’,… and invariably it’s an indication of stereotyping.

If you hear yourself say ‘They’… stop and think!

Try to put some names to the ‘they’. If you cannot put forward any people’s names, but instead your mind’s eye comes up with a faceless stereotype image of ‘a person’, question yourself.

ExtensionManager trouble when installing ExtendExtendScript?

I was contacted by someone who had trouble installing the new GetURL stuff I concocted a few months ago.

Here are some notes that might be helpful if you’re having similar issues:

Please take what follows for what it is worth. There are a number of assumptions being made in the info below which might be incorrect.

​Sometimes ExManCmd does not want to install stuff, and that also affects any third party installers that use ExManCmd.

My theory is that there is some kind of extension repository that is used by ExManCmd.​​

Once that repository gets corrupted, nothing that needs ExManCmd works any more.

The simplest (but most annoying) fix is ‘scorched earth’: uninstall and scrub the computer of anything Adobe, then reinstall from scratch. I don’t like that very much. ​​

The way I get around it for stuff that needs to be deployed is to not use ExManCmd at all; I use Xojo to write my own installers, and in my installer simply ‘unzip’ the .ZXP file where it needs to go.

With some care, I can make sure no odd unwanted files sneak in and the code signatures don’t get invalidated, and it works.

​Yet another ‘sledgehammer’ approach that also works for me is outlined below.

This is probably only practical on an individual workstation. You don’t want to deploy to many computers using the following approach.

​To avoid signature issues, you might want to first turn off the signature checking. In other words, turn on PlayerDebugMode.

See
https://github.com/Adobe-CEP/CEP-Resources/wiki/CEP-5-HTML-Extension-Cookbook-for-CC-2014
or similar, and search for PlayerDebugMode

The ‘unzip straight into CEP/extensions’ might actually work without tweaking PlayerDebugMode as long as you don’t invalidate the signature, but that’s not always straightforward; it’s easier to set PlayerDebugMode.

I use the following command line script on Mac (I put it into a double-clickable shell script file called ‘setPlayerDebugMode.command’):​ ​

defaults write com.adobe.CSXS.4.plist PlayerDebugMode 1 
defaults write com.adobe.CSXS.4.plist LogLevel 5 
defaults write com.adobe.CSXS.5.plist PlayerDebugMode 1 
defaults write com.adobe.CSXS.5.plist LogLevel 5 
defaults write com.adobe.CSXS.6.plist PlayerDebugMode 1 
defaults write com.adobe.CSXS.6.plist LogLevel 5 
defaults write com.adobe.CSXS.7.plist PlayerDebugMode 1 
defaults write com.adobe.CSXS.7.plist LogLevel 5 
defaults write com.adobe.CSXS.8.plist PlayerDebugMode 1 
defaults write com.adobe.CSXS.8.plist LogLevel 5 
killall -u `whoami` cfprefsd ​​

Make sure to ‘chmod +x setPlayerDebugMode.command’

And I have another script to reverse that in shell script ‘clearPlayerDebugMode.command’:​

defaults write com.adobe.CSXS.4.plist PlayerDebugMode 0 
defaults write com.adobe.CSXS.4.plist LogLevel 1 
defaults write com.adobe.CSXS.5.plist PlayerDebugMode 0 
defaults write com.adobe.CSXS.5.plist LogLevel 1 
defaults write com.adobe.CSXS.6.plist PlayerDebugMode 0 
defaults write com.adobe.CSXS.6.plist LogLevel 1 
defaults write com.adobe.CSXS.7.plist PlayerDebugMode 0 
defaults write com.adobe.CSXS.7.plist LogLevel 1 
defaults write com.adobe.CSXS.8.plist PlayerDebugMode 0 
defaults write com.adobe.CSXS.8.plist LogLevel 1 ​
killall -u `whoami` cfprefsd​ ​

These scripts hit all of CC, CC 2014, CC 2015, CC 2017 and CC 2018 in one go.

​Once the PlayerDebugMode is set to 1, you can run extensions with ‘invalid’ signatures. ​

The second step is to use a standard unzip command line tool, to unzip the ZXP file into the location it needs to go.

I do something on the Mac command line:​ ​

cd  ~/Library/Application Support/Adobe/CEP​/extensions 
mkdir com.rorohiko.extendExtendScript 
cd com.rorohiko.extendExtendScript 
​unzip ...pathtozxp.../com.rorohiko.extendExtendScript.zxp

​That seems to work.

Note that the manifest of the downloadable ZXP is only set to go up to CC 2017 – it needs to be adjusted to also support CC 2018. I’ll change that some time when I get round to it.


ExtendExtendScript/GetURL Bug Fix

Note 1-Nov-2020: Make sure to check out my novel approach to GetURL: making curl available in ExtendScript. Not just for InDesign – any Adobe app that supports ExtendScript can use this. More info here:

https://www.rorohiko.com/jsxgeturl

Quick note: someone actually tried using the new GetURL to fetch a JPEG file over https from ExtendScript, and noticed that file was corrupted. This due to a bug in node_modules/GetURL/index.js. Around line 105 a line is missing:

 protocol.get(parsedURL, function(response) { protocol.get(parsedURL, function(response) {
 response.setEncoding('binary'); // <<< THIS IS MISSING
 function checkForCompletion() {

I’ve updated the downloadable material. Updated version is at the same location:

https://www.rorohiko.com/downloads/com.rorohiko.extendExtendScript.zip

More info in the original post:

GetURL for InDesign, Revisited (now with https)

ucf.jar gotchas


Note 16-Oct-2017: For High Sierra users: you need to install Oracle JDK 7 or suchlike and then switch to JDK 7, otherwise ucf.jar won’t run because of missing security providers.
The link below works at this time, but Oracle’s links seem to move stuff around frequently so you might need to poke around a bit to find JDK 1.7u80. Grab it when/while you can.
http://www.oracle.com/technetwork/java/javase/downloads/java-archive-downloads-javase7-521261.html
On the command line, something like

/usr/libexec/java_home -V

shows you what Java versions you have. I then use

export JAVA_HOME=`/usr/libexec/java_home -v 1.7.0_80`

or similar to switch to the JRE 7 before running ucf.jar

Lately I made some automated build setup for an Extension to one of the apps in the Adobe Creative Cloud, and I decided to use ucf.jar for signing (see https://www.adobeexchange.com/resources/7).

In the process, I bumped into some gotchas and interesting tidbits.

I suspect the info below could be old news to many people, or ‘duh’-level stuff that is spelled out in the documentation, but just in case it is not, it’s documented here.

I’ll document my findings here, in the hope they come in handy for someone struggling through a similar ordeal.

Funny side story: it’s already happened multiple times to me that I go out on a Google hunt to resolve some weird issue, and eventually bump into some info I wrote up somewhere, and then forgot about (in the most recent time it happened to me was on the Adobe forums – https://forums.adobe.com/thread/959112).

So, really, this article about ucf.jar is mostly about allowing Google to supplement my own memory. In a few years time I’ll no doubt will be struggling with ucf.jar and will end up on this page. Hi, Kris from the future!

.debug in ZXP, yes we can

First thingy: ucf.jar normally strips out .debug files. This was something I never checked or verified before now, but it looks like ucf.jar does The Right Thing, and strips out .debug

That is a good thing: you don’t want to deploy a ZXP that has a .debug file in it: it opens up a potential back door and some malicious person might try to break in via one of the open ports.

However, my extension was exhibiting different behavior after being packed up into a ZXP, so I really, really wanted to get a ZXP with a .debug file included.

After some poking I found it is possible to force the .debug file to come across by explicitly listing it on the command line.

Something akin to:

 java -jar ./signingtoolkit/ucf.jar  -package -storetype PKCS12 -keystore "$certfile" -storepass "$certpassword" -tsa http://timestamp.digicert.com com.rorohiko.harebrained.zxp -C ../build/dist/com.rorohiko.harebrained . -e ../build/dist/com.rorohiko.harebrained/.debug .debug

seems to do the trick ($certfile and $certpassword are bash environment variables). The trick is to explicitly add in the .debug file.

After that, Anastasiy’s Extension Manager (http://install.anastasiy.com/) happily installs the ZXP with the .debug file included.

Kill cfprefsd

My next head-scratcher came when I was mucking around on my Mac with PlayerDebugMode and LogLevel and the changes I made did not ‘take’.

Turns out there is some caching of preferences going on on Mac OS X, and you need to force the cache to be cleared.

The simplest method I found is to kill cfprefsd.

I now use a few simple double-clickable command-line bash scripts on my Mac to enable and disable the debug mode.

This is my ‘enable PlayerDebugMode’ script. Store it in a command-line script whose file name ends in ‘.command’ and it will be double-clickable from the Finder. Don’t forget to chmod +x !

defaults write com.adobe.CSXS.7.plist PlayerDebugMode 1
defaults write com.adobe.CSXS.7.plist LogLevel 5
killall -u `whoami` cfprefsd

And this is my ‘disable PlayerDebugMode’ script. Same deal.

defaults write com.adobe.CSXS.7.plist PlayerDebugMode 0
defaults write com.adobe.CSXS.7.plist LogLevel 0
killall -u `whoami` cfprefsd

PlayerDebugMode could be something else

The next thing that I figured out is that PlayerDebugMode seemed to only affect the signature verification of the ZXP, at least for the app I was working with.

My incorrect assumption was that PlayerDebugMode would also be turning on or off the debug mode.

That seems not to be the case: as far as I could tell I could leave PlayerDebugMode set to 0, and was still be able to debug the (signed and installed) ZXP, as long as it contains a .debug file.

I have not checked whether this is true for all Creative Cloud applications, but it sure was for the one I was working with.

ucf.jar don’t like no spaces

At some point in time, my fresh ZXPs failed to install due to signature issues.

As it turns out, that was because one of the files in my ZXP had a file name with a space in it.

That throws ucf.jar. I suspect it accounts for the file in the signature, but fails to include the file into the ZXP.

Unlike ucf.jar, ZxpSignCmd does not seem to have this issue.

Once I changed that file name all was well again.

Hope this helps!

Hacking cefclient for lazy CEP debugging

When working on extensions for the Adobe Creative Suite, you can use Chrome as a debugger.

When debugging is enabled, your extension will open up a port, and then you point your browser to http://localhost:<whateverport> to get to the debug interface.

Sadly enough, this stuff is kind of ‘broken-ish’ (see http://raspi.rwf.co/brokenish.html).

For example, you cannot type in the console to inspect stuff, so debugging is a bit frustrating.

Ole Kvern mentioned on the Slack group (adobedevs.slack.com) that a lot of this pain and suffering can be alleviated by using a slightly older cefclient instead of Chrome. See http://opensource.spotify.com/cefbuilds/index.html and look around in the older builds.

I did that and it works a treat.

I prodded and poked around a bit in the available builds, and found that version 51.0.2704.47 works OK for me. There might be more recent versions that work too, but I called ‘good enough’ on this one, and I did not put in any more time.

However, I am lazy. So here’s a little hack I performed. It’s nasty, but it works. I am using a Mac. I assume a closely related similar hack would be possible on Windows.

I only use this cefclient app to do CEP debugging, so I have no qualms making a hacked mongrel version to suit my needs.

For it to work, your debug URL must be exactly 21 characters long (e.g. http://localhost:8070 or suchlike. That means: you want to use a 4-digit port number in your .debug file).

Open the cefclient binary with a Hex Editor (on Mac, it is at …/cefclient.app/Contents/MacOS/cefclient ).

Search for the text ‘http://www.google.com’. It occurs twice – you want the one around position 0x552288.


Replace the text with whatever your debug URL. Make sure to not add or remove bytes. You need to overwrite the URL with something of the same length.

Save and Quit.

And now, each time I launch cefclient, it immediately goes to http://localhost:8070.

The clean way to do this would be to make a variant of cefclient that accepts command-line parameters. I might do that at some point; it would allow me to easily add a ‘debug’ button to my extensions and have it launch the debugger. Together with my old ‘dive into it’ hack (https://coppieters.nz/?p=63) that might make for a more seamless debugging experience. For now, this nasty hack will have to do…

GetURL for InDesign, Revisited (now with https)

Note 1-Nov-2020: Make sure to check out my novel approach to GetURL: making curl available in ExtendScript. Not just for InDesign – any Adobe app that supports ExtendScript can use this. More info here:

https://www.rorohiko.com/jsxgeturl

Note 16-Dec-2019: Latest installer which also supports InDesign 2020 and macOS Catalina:

https://www.rorohiko.com/downloads/ExtendExtendScript.1.0.4.zip

GetURL: some history

A long, long time ago, I wrote a bit of sample code to demonstrate state machines.

On a whim, I decided to implement a bit of the HTTP protocol in ExtendScript and InDesign.

It was never intended to be a full HTTP socket implementation, but in the end, it turned out that the sample served a purpose for many people, as it allowed them to interact with HTTP-based services from ExtendScript.

It was not very fast, and could not handle many HTTP features.

http://rorohiko.blogspot.co.nz/2013/01/geturlsjsx.html

Over time, I added a few little tweaks to help people out, but by now GetURL.jsx must be a contender for the longest living stopgap measure ever.

HTTPS?

Recently, more and more people started asking me for HTTPS support.

Sadly enough, crusty old GetURL.jsx is not up to the task: for efficient HTTPS support, things get a lot more complicated.

Doing it all in pure ExtendScript would be nearly certainly too slow.

So, I decided to find a different solution.

What I am presenting here is ‘work-in-progress’, or maybe better ‘mucking-around-in-progress’.

I am playing around, and try things out. I will probably be tweaking this for some time to come, but it currently works fairly well as-is, so for people in need, they can grab what I have, as-is, and try to make sense of it.

In the following post, I’ll show a solution that allows the ExtendScript coder to write something as simple as

#targetengine TestSomewhere
#include "JSInterface.jsx"

JSInterface.evalScript("console.log('hello');");

// or...
function handleData(data) { 
 alert(data);
}

JSInterface.evalScript(
  "JSInterface.plugins.getURL('https://www.rorohiko.com/welcome.msg')",
  handleData);

// or...

var url = "https://www.rorohiko.com/welcome.msg";
JSInterface.evalScript(
  "JSInterface.plugins.getURL(JSInterface.getData())", 
  url, 
  handleData);

Bear with me…

CEP

For a while now, InDesign and other Creative Cloud apps have been including the Adobe Common Extensibility Platform (CEP) and Extensions.

Essentially, an Extension is akin to a browser (Chrome) with a server (Node.js) all rolled into one, all running as an ancillary process inside of InDesign.

As a result, an InDesign scripter now has two totally separate programming environments at their disposal.

These environments share very similar languages (ExtendScript and JavaScript), which is often a bit confusing.

The ExtendScript (ES) programming environment is ‘inward facing’: it is tightly integrated with InDesign and can interact with the InDesign Document Object Model (DOM).

The JavaScript (JS) programming environment is ‘outward facing’: it can drive user-interfaces that are contained within floating panels and dialog boxes.

Because the JS environment has a complete Node.js available, writing things like an https-capable GetURL replacement is trivial on the JS side.

But that is not a proper solution for the ExtendScripter. A bit of extra work is needed.

Communicating between ES and JS

The ES and JS environments are quite separate, and run independently of one another. They don’t have a direct connection.

Instead, there is a ‘callback’-based interface. From the JS environment, one can initiate some operation in the ES environment. When the ES environment completes the task, it calls back to the JS environment with the results.

To compound the issue, the JS environment provides multiple independent runtimes (i.e. you can run multiple extensions concurrently), whereas the ES environment is a single-tasking shared resource: when an operation is launched from any of the active JS environments in ES, the ES environment gets busy in mumble mode, and any subsequent ES operation request from any other JS will stall until the previous ES operation is finished.

Lots more info about all this can be found here:

https://github.com/Adobe-CEP

CSInterface

One thing that always annoyed me a bit was the asymmetrical nature of the interface between JS and ES.

In JS you have a ‘CSInterface’ thingy and you can call sumtin’ like

csInterface.evalScript(<some script>, <some callback>)

to execute a script in ES, and be woken by the callback when it is done.

JSInterface: Evening The Score

To even the score a bit, I first set out to create a similar ‘JSInterface’, as a component of my ‘GetURL.jsx’-replacement.

JSInterface allows you to call JS from ES.  You can receive a callback when it is done.

The extension includes a CSXS manifest file that covers CC 2015 and CC 2017. I suspect it might run with lower versions after a bit of tweaking in the manifest, but I have not tried that.

For this to work, you also need to run your ES script in a persistent engine.

If you were to run in the ‘main’ (default) engine, the callback would not work because the whole engine vanishes out of existence as soon as the JS call returns and the ES script can run to completion.

Most of the time, a JS call will return before it completes, and a non-persistent ES engine will have gone by the time the JS call wants to perform a callback.

The main idea behind JSInterface is to allow developers to be ‘ExtendScript’-centric – i.e. concentrate on ExtendScript and ignore most of the JS details.

Often, you want to write some simple ExtendScript code, and don’t have any need for all the bells and whistles JS offers… except for one or two small features.

That’s where JSInterface comes in: you write all your code in ES, and occasionally call out to JS when you need something special.

JSInterface has a plug-in architecture. It currently comes with a single plugin, called ‘getURLPlugin’ which implements the coveted getURL method that can handle HTTPS.

Additional plug-ins can be added as needed: the idea is that you write little functions using JS/Node.js and expose them to ES via the plug-in architecture. You can then easily call them from ES, and JSInterface takes care of the glue.

Usage

Note: all material as-is: there is not much documentation. Use at your own risk.

You have a few options:

  • Simple Installer:
    https://www.rorohiko.com/downloads/ExtendExtendScript.1.0.4.zip
  • If you want to delve a bit deeper: ZXP file and source code:
    https://www.rorohiko.com/downloads/com.rorohiko.extendExtendScript.zip

    This source code folder contains
    – a subfolder call ‘dist’ containing a ZXP file
    – a subfolder called ‘com.rorohiko.extendExtendScript’ with all source code

  • Run the installer, or install the com.rorohiko.extendExtendScript.zxp, or install manually.
    For installing the ZXP file, you use something like Anastasiy’s Extension Manager (http://install.anastasiy.com/), or ZXPInstaller (http://zxpinstaller.com).
    You can also set the CEP debug flag, then copy the ExtendExtendScript extension manually from the source code folder into one of the Adobe extensions folders.
    Restart InDesign for good measure.
  • To see it in action: grab the following three files from the
    com.rorohiko.extendExtendScript/examplefolder
    

    and put them in the InDesign scripts folder or a subfolder thereof:

    CallGetURL.jsx
    json2.jsx
    JSInterface.jsx

    CallGetURL.jsx is the actual sample code; the other two files are modules that CallGetURL.jsx depends on.

  • Double-click CallGetURL.jsx. A dialog with some data retrieved from an HTTPS-based URL should display.

    JSInterface

If you want to delve into JSInterface or add plug-ins or suchlike, you’ll need to read a bit of code. Not much documentation there, but the code should be more or less straightforward.

Errata and Notes

Note 16-Dec-2019: There is now an easy installer for ExtendExtendScript which supports macOS Catalina and InDesign 2020.

Note 13-Mar-2018: There is now an easy installer for ExtendExtendScript. See https://coppieters.nz/?p=220

Note 11-Oct-2017: there was a bug in node_modules/GetURL/index.js. Around line 105 a line is missing:

 protocol.get(parsedURL, function(response) { protocol.get(parsedURL, function(response) {
 response.setEncoding('binary'); // <<< THIS IS MISSING
 function checkForCompletion() {


I’ve updated the downloadable .zip file

I’ll be at the Creative Developers Summit in Atlanta in May 2017 – anyone in need of more info or assistance, feel free to catch up with me there!

Things To Come

Silly thoughts: I want to do some debugging/monitoring support in the panel (e.g. allow console.log from ExtendScript). Maybe get started on a ES Toolkit replacement or ScriptUI replacement as a panel?

Creative Developers Summit

From InDesign To Scribus, An Automator’s Perspective – part 1 of many.

(writing in progress)

I bit the bullet – I am going to dig into Scribus, and add it to my toolkit.

http://www.scribus.net/downloads/

Adobe is not what it used to be. The company becomes increasingly erratic and difficult to work with for a third-party developer. As far as I can tell, Adobe is ‘doing a Quark’ on a large subset of its users.

So, after ten years of neglecting it, I’m getting back up to speed on automation with QuarkXPress 2015, and I am also looking at Scribus.

I looked at Scribus a while back and did not get very far before I lost interest. As far as I could tell, Scribus was nowhere near as powerful as InDesign, so it would not be an option for many people.

This time around I decided to look mainly at what it can do, rather than concentrate on what it cannot do. Scribus will only improve if more people start using it; it’s a chicken-and-egg situation.

I want to make sure I can help automate projects where Scribus is an option. And Scribus is definitely powerful enough to be useful for a range of real-life projects.

Getting into Scribus

Getting into Scribus will be different for everyone.

I’m looking for things that I’m familiar with. As I go, I try to map things I know from other environments onto things I discover in Scribus.

I just spent half an hour with Scribus and its documentation, and as far as I can tell, the available documentation is not a good resource for the kinds of questions I have as an system designer and automator.

What I intend to do here is keep track of my questions and the answers I found.

Anyone else in the automation game is bound to have similar questions and might find my notes useful.

I’ll be using a Mac most of the time, but I’ll also take sneak peeks at the Windows and Linux versions along the way.

I’ll be looking at both Scribus 1.4.5 and Scribus 1.5.0. According to the web page, 1.4.x is a stable version, whereas 1.5.x is a development version.

1.5.x has some interesting things in its feature list, like IDML import. I’ll be trying that out!

What about scripts?

Being in automation, this is an important point for me.

Scribus can be scripted, and the ‘native’ scripting language is Python, rather than ExtendScript. That’s cool.

Ok, let’s try to do a few ‘Hello World’ scenarios and see if we learn anything.

First, I did a bit of snooping, stole some sample code left and right, and came up with the following script:

#!/usr/bin/env python
# -*- coding: utf-8 -*-

import sys
import scribus
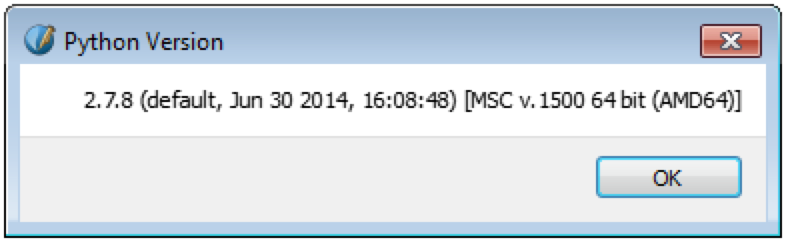
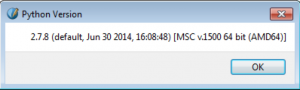
scribus.messageBox('Python Version', sys.version, icon=scribus.ICON_NONE, button1=scribus.BUTTON_OK)

I saved this file to my desktop as Version.py, and then used the Script – Execute Script… menu item to run this script from Scribus 1.4.5 and 1.5.0.

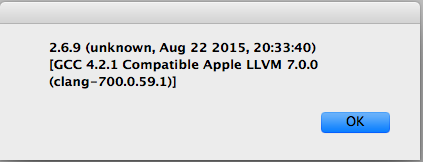
From Scribus 1.4.5 on Mac OS X 10.11:

Screen Shot 2015-10-08 at 6.04.05 PM

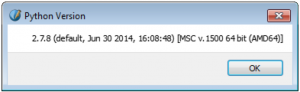
From Scribus 1.5.0 on Mac OS X 10.11:

Screen Shot 2015-10-08 at 7.11.07 PM

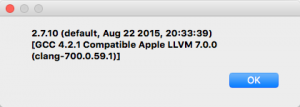
This tells me that Scribus uses Python 2.x, and that it uses an embedded Python interpreter, rather than relying on the Python interpreter provided by the Mac OS. Otherwise I would expect the two Python interpreter versions to be identical.

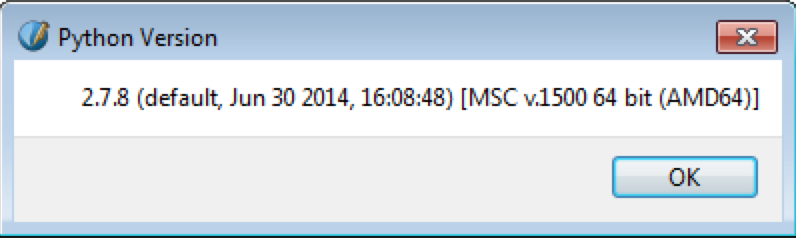
On Windows 7 x64 with Scribus 1.4.5:

Screen Shot 2015-10-08 at 7.00.02 PM

And with Scribus 1.5.0:

Screen Shot 2015-10-08 at 7.13.02 PM

Looks like the Windows versions both embed the same version of Python.

It looks like I’ll need to install Ghostscript separately to enable some of the Scribus functionality relating to Postscript and EPS. I’ll look into that later.

Where are the scripts?

The second thing I want to know: where are the scripts? When you look at the Scribus Script (in 1.4.5) or Scripter (in 1.5.0) menu, it shows a whole range of sample scripts.

I’ll refer to the menu item as the Script menu item, even though it is called Scripter in 1.5.0. For example, when you see me mention a menu item Script – Show Console, it might actually be called Scripter – Show Console.

On the Mac, the scripts shown in the menu are located inside the Scribus app. On my system that’d be:

/Applications/Scribus.app/Contents/share/scribus/scripts

On Windows I found them here:

C:\Program Files\Scribus\share\scripts

This list of scripts shown in the menu seems to be refreshed only on restart of Scribus. If you add or modify any scripts while it’s running, the menu won’t update. This is unlike InDesign, where the Scripts Palette is dynamic and updates as scripts are added or modified.

Separate from that, there is also a configurable path to a scripts folder, which can be accessed via the Scribus – Preferences – Paths  (in 1.5.0) or Scribus – Preferences – General (in 1.4.5) menu item.

This folder can be set to something like, say,

/Users/kris/Documents/Scribus Scripts

Somewhat surprising: this folder is only used when you use the Script – Execute Script… menu item: it is the default folder location your dialog will open to.

It does not affect the list of scripts shown in the Script menu; that folder location seems to be hard-coded.

How does the console work?

For my first test, I used the scribus.messageBox function to plunk something into a dialog. However, for debugging and so on, I’d love to get some continuous text output.

My next question is: how can I write to a console from a script?

There is a console under the Script – Show Console menu item, but that was not really what I was looking for.

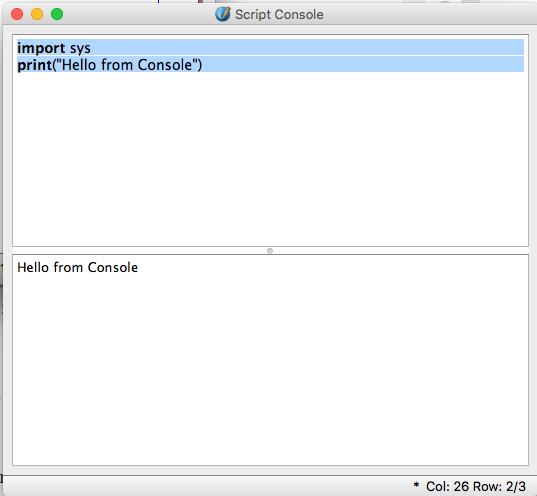
It took me a bit of searching, and as it turns out, the secret to the Scribus Console window seems to be function key <F9>.

Enter or copy-paste a script in the top half of the Console, then press <F9>.

Depending on how your Mac is configured you might need to change the System Preferences, or possibly press <fn>-<F9> or something like that.

Screen Shot 2015-10-09 at 2.45.53 PM

Check your System Preferences – Keyboard and System Preferences – Mission Control setup.

But that’s not really what I was after. I am looking for a way to get debugging info out from my scripts into a scrolling window.

The first method that worked for me was to start a Terminal window, and then navigate into the Scribus.app.

Then launch Scribus from the command line. After that, I get to see any output from Python in the Terminal window.

First I launch Scribus via the Terminal:

cd /Applications/Scribus.app/Contents/MacOS/
./Scribus

It spits out some information:

Path = /Applications/Scribus.app
"scpaths: bundle at /Applications/Scribus.app"
"scpaths: doc dir=/Applications/Scribus.app/Contents/share/doc/scribus/"
"scpaths: icon dir=/Applications/Scribus.app/Contents/share/scribus/icons/"
"scpaths: font dir=/Applications/Scribus.app/Contents/share/scribus/fonts/"
"scpaths: sample dir=/Applications/Scribus.app/Contents/share/scribus/samples/"
"scpaths: script dir=/Applications/Scribus.app/Contents/share/scribus/scripts/"
"scpaths: template dir=/Applications/Scribus.app/Contents/share/scribus/templates/"
"scpaths: lib dir=/Applications/Scribus.app/Contents/lib/"
"scpaths: plugin dir=/Applications/Scribus.app/Contents/lib/"
"scpaths: QML dir=/Applications/Scribus.app/Contents/share/scribus/qml/"
"scpaths: qtplugins=/Applications/Scribus.app/Contents/PlugIns:/Applications/Scribus.app/Contents/MacOS"
Fontconfig error: Cannot load default config file

Then I run a little ‘Hello World’ Python script via the Script -Execute Script… menu item.

#!/usr/bin/env python
# -*- coding: utf-8 -*-

import sys
print "Hello World"

That makes ‘Hello World’ appear in my terminal window.

Another way that works is to use the Python syslog. The script

import syslog
syslog.syslog(syslog.LOG_ALERT, 'Hello in syslog')

makes a log entry appear in the /var/log/system.log file.

What about the scribus module

I started Scribus from the command line as shown before, and then ran the following script:

#!/usr/bin/env python
# -*- coding: utf-8 -*-

import scribus

help(scribus)

That made it spit out oodles of documentation in the Terminal window.

You can also simply type

help(scribus)

into the Console window, then hit <F9>.

To come

Here’s a bunch of stuff I still want to look into:

Scribus console mode

C++ plug-ins:

http://wiki.scribus.net/canvas/Plugin_Architecture

C++ API

http://wiki.scribus.net/canvas/Public_C%2B%2B_API

Extension Scripts vs. regular scripts?

UTF-8 and stuff? How does it handle file names with non-ASCII characters? And text with non-ASCII characters?

Database publishing. Maybe tie a FileMaker and/or MySQL database to Scribus, just to try it out?

Must use Symbolic Links Instead of Alias for InDesign CC 2015 on OS X

Here’s a little tidbit. It’s not much, but it’s a little annoyance in InDesign CC 2015, and how I’m working around it.

It’s particular to my workflow. As everyone has their own preferred way to do things, and I suspect not many people have the same workflow as I do, this might be a worthless tip, but I am putting it out nevertheless, just in case. I hope this helps someone!

In previous versions of InDesign, you could add stuff to the Scripts Panel by means of a Mac OS X alias. With InDesign CC 2015, that does not work any more, and you must use a symbolic link instead.

Some more detail:

I do most of my InDesign script development with InDesign on a Mac. My workflow is often as follows:

– I have some Git repository with ‘stuff’ under development

– For InDesign scripts, I’ll have a project folder with the script under development and some other ‘subservient stuff’ – helper files, read me files, PHP scripts, XSLT files,…

– To test my script, I like to add it to the InDesign Scripts Panel, so I can run it from InDesign by double-clicking the script on the Scripts Panel.

I have this ‘habitual process’ to create a reference to my script on the Scripts Panel; I perform the following steps:

1) Start InDesign CC 2014 or earlier, and go to the Scripts Panel

2) Right-click (or Control-click) the User folder, and select Reveal in Finder. The Scripts folder opens in the Finder

3) Go find my source code folder in the Git repository

4) Drag the project folder containing the script and the helpers while holding Command+Option, and drop it inside the Scripts Panel folder.

That creates an alias which references the project folder inside the Git repository.

In InDesign CC 2014 and earlier, the alias works like ‘the real thing’: you get a disclosure triangle, etc…

(click to see larger version):
Screen Shot 2015-10-07 at 5.01.11 PM

Enter InDesign CC 2015. This approach does not work any more. Yay.

The workaround is to use a symbolic link rather than an alias.

It’s not as quick, but it works, at least for now.

Here’s my new procedure:

I often use a tool called cd to… which helps me a bit:

https://github.com/jbtule/cdto

This tool allows you to click a button in a Finder window for a particular folder, and it automatically opens a Terminal window that has been ‘cd’-ed to that folder.

So, now my procedure is:

1) Start InDesign CC 2015, go to the Scripts Panel.

2) Right-click (or Control-click) the User folder, and select Reveal in Finder. The Scripts folder opens.

3) Go find my source code in the Git repository

4) Select the Scripts Panel folder icon in the Finder window. Then click the cd to… button, so a Terminal window opens inside the Scripts Panel folder.

5) Start typing

ln<space>-s<space>

Now drag the script source folder from the repository and drop into the open terminal window, so it auto-types the full path for you. Then continue typing

<space>.

Don’t forget the trailing period-character. The end result is the command to create a symbolic link, e.g. something like:

ln -s /Users/kris/Documents/Controlled/Rorohiko/Crawler .

Hit <Enter>.

The folder now appears on InDesign scripts panel and works as expected.

(click to see larger version):
Screen Shot 2015-10-07 at 5.24.57 PM