Finding InDesign Developer Versions

Disclaimer: the info below is a ‘best effort’ – it might be inaccurate or outdated by the time you read it. Make sure to verify any of the information below. Feel free to drop me an email to
kris at rorohiko.com
if you spot any inaccuracies.

Jump further down to the second section Where can we find…? for a straight list of InDesign versions and download locations.

I always have a hard time finding my way around the Adobe developer resources for InDesign development.

Maybe I am missing something, but I find them scattered over multiple places, and each time I need to download something, I end up in a wild goose chase trying to catch the elusive file I am after.

Below I will put my notes that are meant to help me remember where stuff is. It’ll just be a list of links and sites and stuff, organized in a way that fits my way of working. I am putting it out here, as it might be useful to someone else too.

What Is Available?

If you are looking for all material regarding a particular InDesign version, skip to the next section – I will re-order the same information in this section by version.

First, I’ll list what is available, collated by the location where you can find it.

There are two main focal points where you will find the files you’re after: the Adobe Prerelease program, and the Adobe I/O web site.

https://console.adobe.io/downloads/id

https://www.adobeprerelease.com/

That first URL is somewhat hard to find. I found it via the following sequence: first, I went to https://www.adobe.io/apis.html, clicked on ‘Adobe InDesign’, which lead to https://www.adobe.io/apis/creativecloud/indesign.html. Then I had to click on ‘Get Started Today’ and that then took me to the downloads page I was after. Once you’re on the download page, you need to scroll down a bit; that might not immediately obvious.

On the downloads page you can download the CEP, ITK Symbol, C++ Plugin SDK, Scripting, and Server SDK for InDesign CC 2017, 2018 and 2019.

To gain access to the second URL, you need to enroll in the Adobe Prerelease program. AFAIK, some or all of the material in this area is under NDA.

Once you’re enrolled, you then might be interested to request access to the following programs:

  • InDesign CC Developers Prerelease: Here you’ll find debug and release versions of InDesign and InDesign Server, going as far back as CC 2017, up to 2020.
  • InDesign CC Prerelease: seems to be a subset of the above program
  • InDesign CC Server Trial Downloads Program: this gives you access to time-limited copies of InDesign server.
  • InDesign Family SDK Download Program: this gives you access to old C++ SDKs (CC 2017 and before).
  • InDesign Family Rapid Release Program: this gives you access to rapid release bug fixes.
  • Creative Cloud Developer Prerelease: (NDA program). Gives you access to tools you might need when working with CEP.

Where can we find…?

ExtendScript Toolkit

You need to enable ‘Show Older Versions’ in the Creative Cloud control panel. After that, ExtendScript Toolkit will be listed and available to install.

InDesign 2020

Beta version: via InDesign CC Developers Prerelease program on https://www.adobeprerelease.com/
Debug version: via InDesign CC Developers Prerelease program on https://www.adobeprerelease.com/
C++ SDK: via InDesign CC Developers Prerelease program on https://www.adobeprerelease.com/
Windows 64-bit only

InCopy 2020

Beta version: via InDesign CC Developers Prerelease program on https://www.adobeprerelease.com/
Debug version: via InDesign CC Developers Prerelease program on https://www.adobeprerelease.com/
C++ SDK: via InDesign CC Developers Prerelease program on https://www.adobeprerelease.com/
Windows 64-bit only

InDesign Server 2020

Beta version: via InDesign CC Developers Prerelease program on https://www.adobeprerelease.com/
Debug version: via InDesign CC Developers Prerelease program on https://www.adobeprerelease.com/
C++ SDK: via InDesign CC Developers Prerelease program on https://www.adobeprerelease.com/
Windows 64-bit only

InDesign CC 2019

Release version: via the Creative Cloud Panel
Installer version: via the InDesign CC Developers Prerelease program on https://www.adobeprerelease.com/
Debug version: via the InDesign CC Developers Prerelease program on https://www.adobeprerelease.com/
C++ SDK: via https://console.adobe.io/downloads/id
Windows 32-bit and 64-bit available

InCopy CC 2019

Release version: via the Creative Cloud Panel
Installer version: via the InDesign CC Developers Prerelease program on https://www.adobeprerelease.com/
Debug version: via the InDesign CC Developers Prerelease program on https://www.adobeprerelease.com/
C++ SDK: via https://console.adobe.io/downloads/id
Windows 32-bit and 64-bit available

InDesign CC Server 2019

Release version: via normal distribution channels
Time-limited test: via the InDesign CC Server Trial Downloads Program on https://www.adobeprerelease.com/
Watermarked developer release version: via the InDesign CC Developers Prerelease program on https://www.adobeprerelease.com/
Debug version: via the InDesign CC Developers Prerelease program on https://www.adobeprerelease.com/
C++ SDK: via https://console.adobe.io/downloads/id
Windows 64-bit only

InDesign CC 2018

Release version: via the Creative Cloud Panel
Installer version: via the InDesign CC Developers Prerelease program on https://www.adobeprerelease.com/
Debug version: via the InDesign CC Developers Prerelease program on https://www.adobeprerelease.com/
C++ SDK: via https://console.adobe.io/downloads/id
Windows 32-bit and 64-bit available

InCopy CC 2018

Release version: via the Creative Cloud Panel
Installer version: via the InDesign CC Developers Prerelease program on https://www.adobeprerelease.com/
Debug version: via the InDesign CC Developers Prerelease program on https://www.adobeprerelease.com/
C++ SDK: via https://console.adobe.io/downloads/id
Windows 32-bit and 64-bit available

InDesign CC Server 2018

Release version: via normal distribution channels
Time-limited test: via the InDesign CC Server Trial Downloads Program on https://www.adobeprerelease.com/
Watermarked developer release version: via the InDesign CC Developers Prerelease program on https://www.adobeprerelease.com/
Debug version: via the InDesign CC Developers Prerelease program on https://www.adobeprerelease.com/
C++ SDK: via https://console.adobe.io/downloads/id
Windows 64-bit only

InDesign CC 2017

Release version: –
Installer version: via the InDesign CC Developers Prerelease program on https://www.adobeprerelease.com/
Debug version: via the InDesign CC Developers Prerelease program on https://www.adobeprerelease.com/
C++ SDK: via https://console.adobe.io/downloads/id and InDesign Family SDK Download Program on https://www.adobeprerelease.com/
Windows 32-bit and 64-bit available

InCopy CC 2017

Release version: –
Installer version: via the InDesign CC Developers Prerelease program on https://www.adobeprerelease.com/
Debug version: via the InDesign CC Developers Prerelease program on https://www.adobeprerelease.com/
C++ SDK: via https://console.adobe.io/downloads/id and InDesign Family SDK Download Program on https://www.adobeprerelease.com/
Windows 32-bit and 64-bit available

InDesign CC Server 2017

Release version: via normal distribution channels
Time-limited test: via the InDesign CC Server Trial Downloads Program on https://www.adobeprerelease.com/
Watermarked developer release version: via the InDesign CC Developers Prerelease program on https://www.adobeprerelease.com/
Debug version: via the InDesign CC Developers Prerelease program on https://www.adobeprerelease.com/
C++ SDK: via https://console.adobe.io/downloads/id and InDesign Family SDK Download Program on https://www.adobeprerelease.com/
Windows 64-bit only

InDesign CC 2015

Release version: –
Installer version: via the InDesign CC Developers Prerelease program on https://www.adobeprerelease.com/
Debug version: via the InDesign CC Developers Prerelease program on https://www.adobeprerelease.com/
C++ SDK: via InDesign Family SDK Download Program on https://www.adobeprerelease.com/
Windows 32-bit and 64-bit available

InCopy CC 2015

Release version: –
Installer version: via the InDesign CC Developers Prerelease program on https://www.adobeprerelease.com/
Debug version: via the InDesign CC Developers Prerelease program on https://www.adobeprerelease.com/
C++ SDK: via InDesign Family SDK Download Program on https://www.adobeprerelease.com/
Windows 32-bit and 64-bit available

InDesign CC Server 2015

Release version: via normal distribution channels
Time-limited test: via the InDesign CC Server Trial Downloads Program on https://www.adobeprerelease.com/
Watermarked developer release version: via the InDesign CC Developers Prerelease program on https://www.adobeprerelease.com/
Debug version: via the InDesign CC Developers Prerelease program on https://www.adobeprerelease.com/
C++ SDK: via InDesign Family SDK Download Program on https://www.adobeprerelease.com/
Windows 64-bit only
Using the VSCode/ExtendScript Debugger

Below my (Mac specific) working notes for working with the new ExtendScript debugger plug-in for VSCode. I decided to put these out in the open and hope to save someone some frustration.

Your mileage may vary. I find it currently very hard to use because it is brittle and there is no end to crashes, lockups, and general wonkiness.

Switching from ESTK to VSCode:

  • Replace ‘#’ for directives with ‘//@’:
    #targetengine -> //@targetengine
    etc…
  • Add your parent folder with your script or scripts to a new workspace in VSCode. Save the workspace file somewhere close by.
  • Create a .vscode/launch.json file in the workspace folder.
    App "targetSpecifiers” are as in ESTK.
    Examples:
    indesign-14.064 -> 14 refers to InDesign CC 2019, 064 refers to it being a 64 bit version.
    illustrator-23.064 -> 23 refers to Illustrator CC 2019, 064 refers to it being a 64-bit version.
    And so on…
    For the path to the script I right-click the .jsx file in workspace source tree view in the left hand side of the VSCode window.
    Select Copy Path from the context menu, then paste it into the launch.json for the "program" property.

Example launch.json that I use to start with:

{
"version": "0.2.0",
"configurations": [
{
"type": "extendscript-debug",
"request": "launch",
"dontBreakOnErrors": true,
"targetSpecifier": "indesign-14.064",
"engineName": "whateverengine",
"name": "A name",
"program": "pathToTheScript",
"stopOnEntry": false
}
]
}

  • In VSCode, switch to Debug mode (click the bug icon in left hand toolbar)
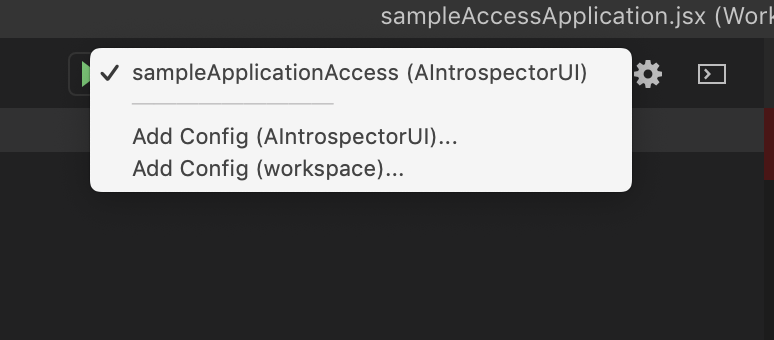
  • Click the popup right of the green ‘Play’ button at the top, and select a config that you listed in the launch.json
  • Make sure ESTK is not running. If it is running, you’ll get
    (#15) Can’t initialize target
    in the next step.
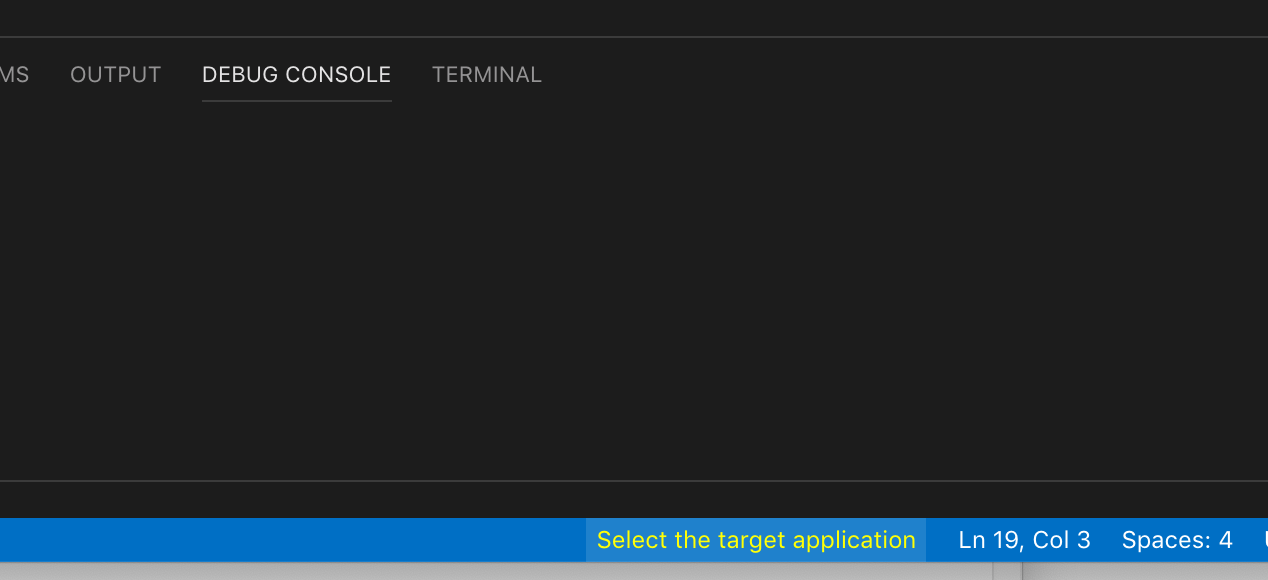
  • In VSCode, click at the bottom, on the yellow
    Select the target Application
  • If ESTK is not running but you still get 
    (#15) Can’t initialize target
    you need to quit VSCode and on the command line, run

    killall "Code Helper"

    Restart VSCode, then try selecting target application again as before.
  • If you get

    (#15) Cannot execute script in target engine ‘…’!

    It most often indicates a syntax error or so. The fun bit is when it comes to //@include files: VSCode will not report any issues (so all seems well), but it will refuse to run. If that’s the case, you need to open all include files and hunt for the error. Or launch ESTK, which does report the issue straight away.
  • For debugger versions before 1.1.0: If you get

    Cannot debug Error #1116

    you might have inadvertently upgraded to VSCode >= 1.33 which is incompatible.
  • If so, first turn off automatic updates in VSCode. Switch them off now, or it will immediately re-update as soon as you install VSCode 1.32.
  • Then downgrade to VSCode 1.32
    https://vscode-westeu.azurewebsites.net/updates/v1_32
  • Once it’s all good, click the green ‘Play’ button at the top.
  • If your find things start to go wonky (e.g. you cannot inspect certain variables any more or other general wonkiness), you need to start over. Quit your target app, quit VSCode, do the killall…

Useful links

Cannot initialize target:

https://medium.com/adobetech/extendscript-debugger-for-visual-studio-code-public-release-a2ff6161fa01


https://forums.adobe.com/message/10952076#10952076

Version 1.32 of VSCode (1.33 is broken)
https://vscode-westeu.azurewebsites.net/updates/v1_32

Forum
https://forums.adobe.com/community/creative_cloud/add-ons/extensions

ESTK Cannot debug Error #1116
https://medium.com/adobetech/workaround-for-extendscript-toolkit-debugger-error-1116-f067f81f96c6

https://medium.com/adobetech/extendscript-debugger-for-visual-studio-code-windows-compatible-prerelease-f1537375c3f6

Prerelease forum

https://forums.adobeprerelease.com/exmancmd/categories/estkvsc

ReadMe
https://forums.adobeprerelease.com/exmancmd/discussion/42/extendscript-debugger-for-macos-readme/p1

wxMaxima with MacPorts/Mojave

I recently updated my Mac to macOS Mojave (10.14.1).

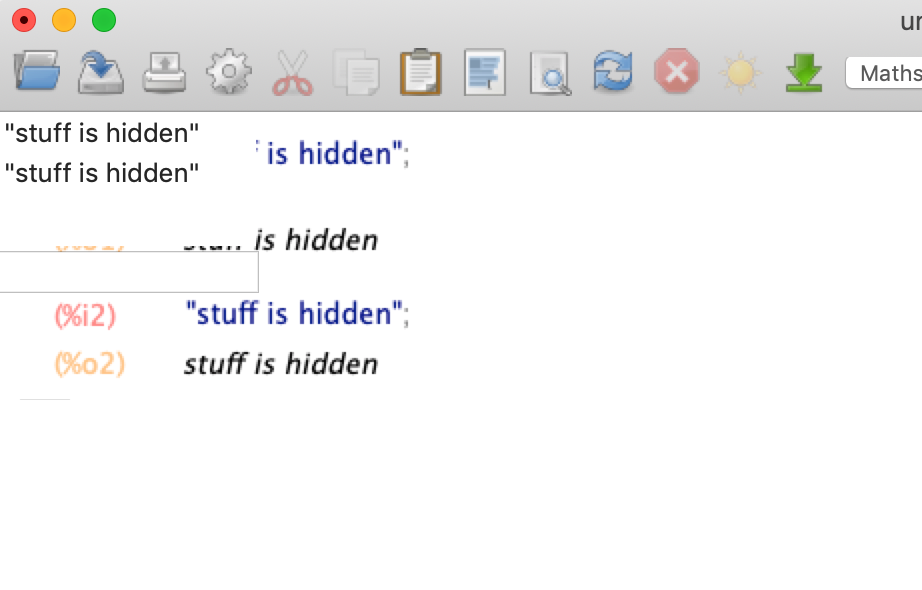
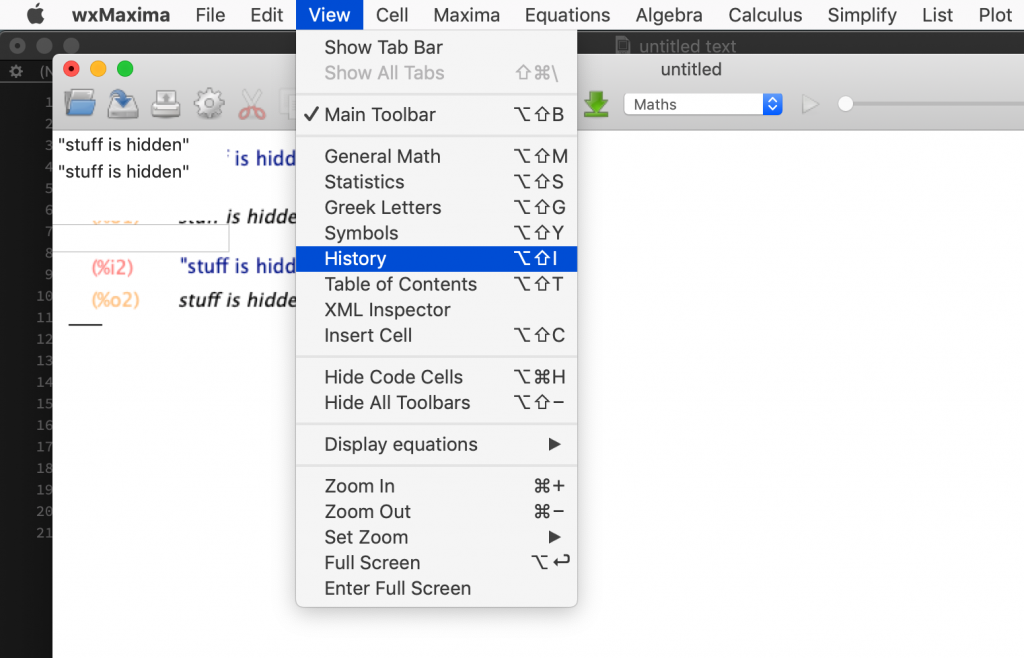
I was upgrading my MacPorts stuff, and found that wxMaxima was behaving weirdly – some smallish rectangular scroll frame is overlapping the main window and wxMaxima does not work right.

The display looks garbled and corrupted.

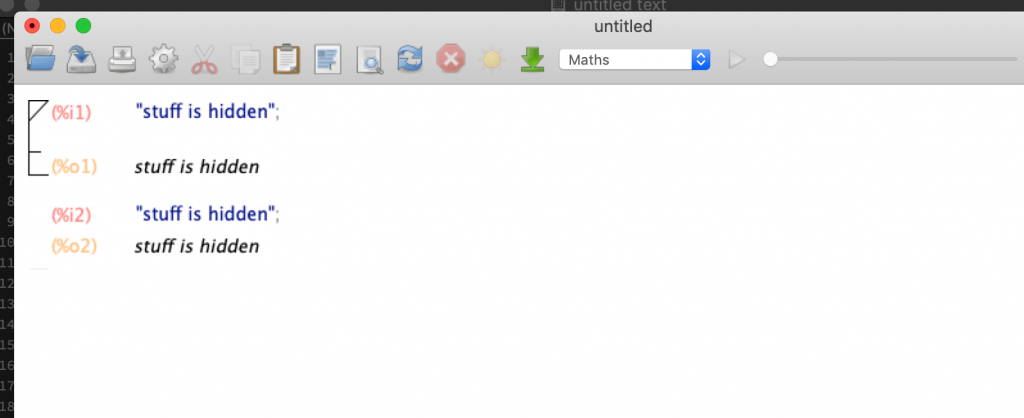
I found a way to make it behave better: show, then hide the History (menu item View – History). 

The scrolly thing seems to be a garbled history frame, and show/hiding cleans it up.

Hope that helps someone!


CEPSparker: get started building CEP panels for Adobe Creative Cloud

https://github.com/zwettemaan/CEPSparker. More info further below

If your developer team is (or will be) building CEP panels for Adobe Creative Cloud, consider hiring me to teach a hands-on training course and help them hit the ground running.

The up-ramp to efficient CEP panel development is steep, and I can help you reduce the unproductive ‘getting started’ time.

Contact [email protected] for more info.

I’ve been diligently building a ‘starter’ project for people wanting to dive into CEP-based extensions for Adobe Creative Cloud apps.

There’s still a long way to go, but the project has reached a stage where it is ripe enough for public consumption.

The project has a number of interesting aspects:

  • Encourage code reuse between ExtendScript and JavaScript
  • Tools for building, debugging, and project maintenance are provided
  • Nearly all these tools are written as human-readable command line scripts, so the tools also serve as documentation for the underlying processes
  • Text-based search-and replace customization tool, which reads from a template project to convert to a usable starter project
  • Absolutely minimal ‘side’ requirements: a Mac or Windows, Adobe Creative Cloud, a text editor and a Chrome-engine-based browser for debugging. That’s all you need.

Go have a look, and if you like the idea, ‘star’ the project on GitHub.

Currently, I am working on the ‘how to debug’ cookbooks. Especially debugging the embedded ExtendScript code inside the CEP panel can prove challenging.

I’ve just added a new JavaScript function ‘evalScript_AI_DEBUG’ for Illustrator ExtendScript, which works like CSInterface.evalScript, but uses a debuggable engine (“main”) instead of the anonymous, non-debuggable engine used by Illustrator CEP panels.

Xcode 9 Setting Names vs. Setting Titles

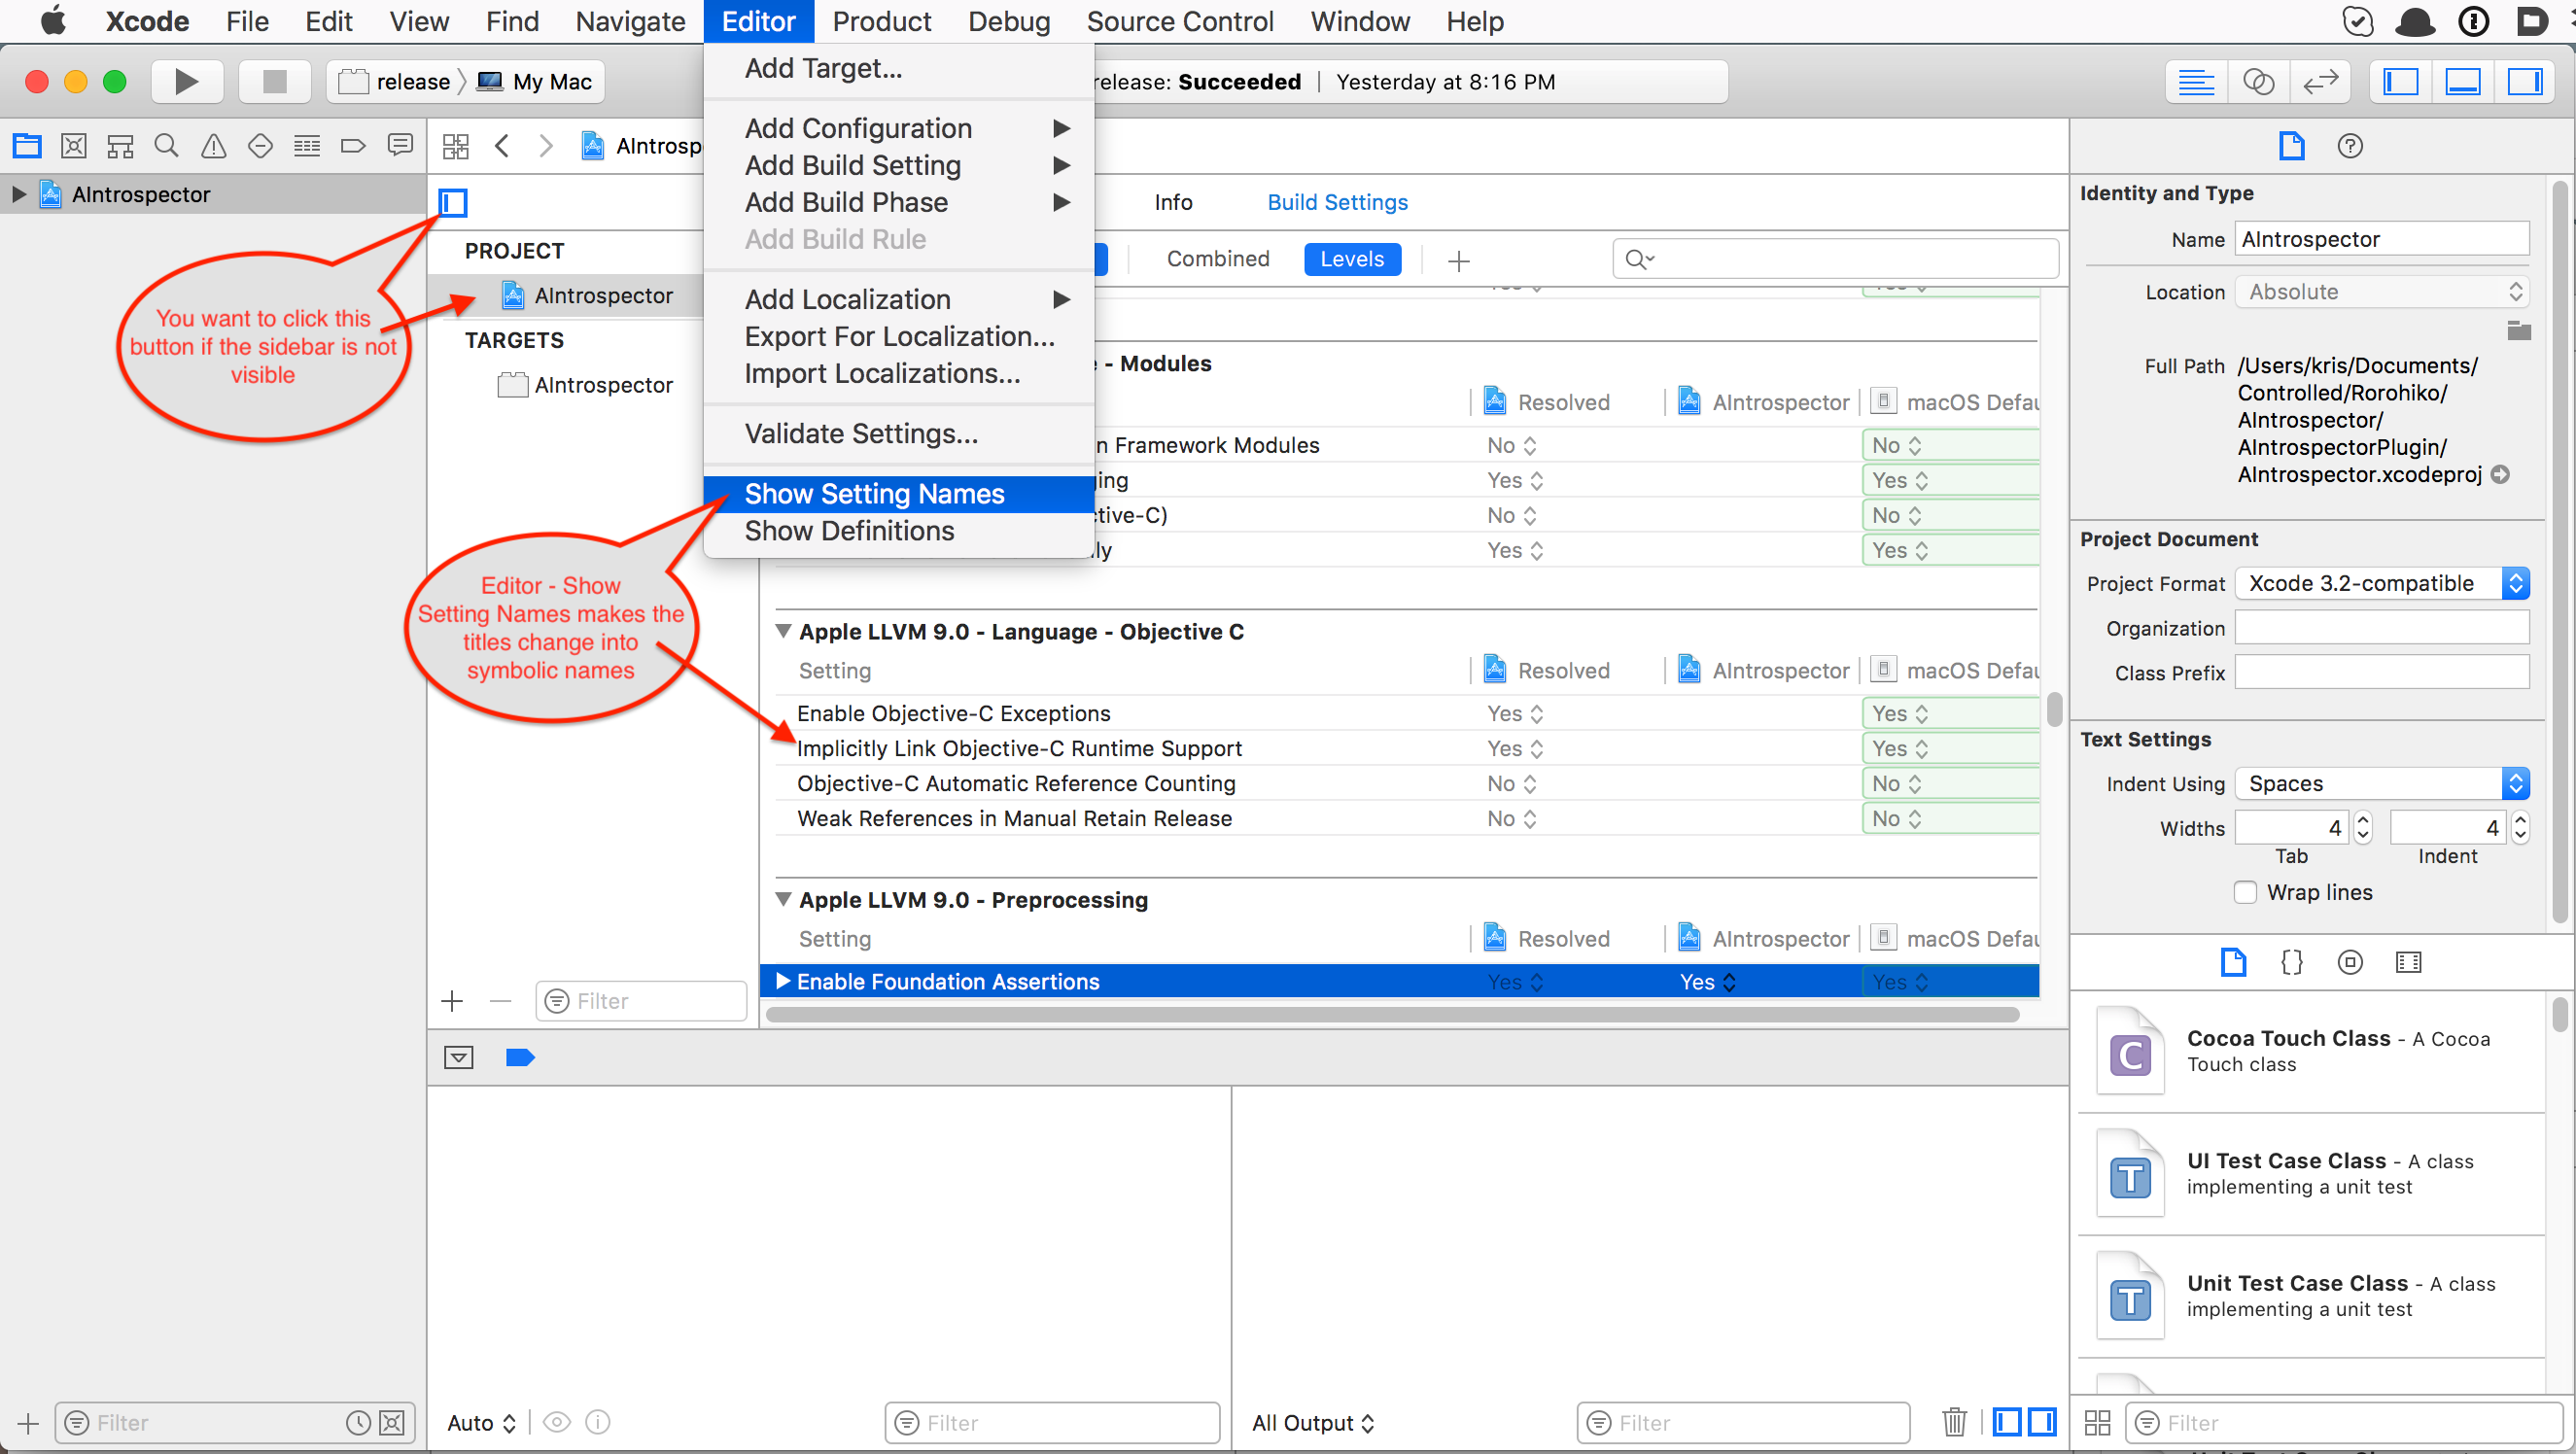
See screenshot below. That should help.

I use Xcode only every so often, and when I do, things have moved on, and I always feel like a stranger in a strange land.

I think Apple is rearranging the furniture (i.e. changing the UI) just for the heck of it.

So, I was in for another spate of Xcode, and for the life of me, I could not figure out how to show build setting names instead of setting titles.

The Build Setting Titles are the readable version (e.g. ‘Enable Objective-C Exceptions’), and the Build Setting Names are the uppercase things (e.g. CLANG_ENABLE_OBJ_ARC).

In the past I used to be able to double-click any one of those titles or names and it would flip between the two states. That does not work any more. Probably that worked too well, and developers were way too efficient.

Later, I think I vaguely remember there was a some clickable control somewhere you could click. If it was ever there, it’s gone now.

For Xcode 9 it took me quite a bit of effort to find where it is now. It’s under the ‘Editor’ menu – ‘Show Setting Names’ or ‘Show Setting Titles’.

Also, there is a new Project/Targets sidebar that I don’t remember seeing in previous Xcode versions.

That sidebar is important. And probably because it is important, it is well hidden and not easy to find.

Below a screenshot that shows where those darn things are in Xcode 9. Hope this saves someone else some frustration.

ExtendExtendScript/GetURL: now with a simple installer

Note 23-Jan-2023: Make sure to check out my novel approach to GetURL: making curl available in ExtendScript. Not just for InDesign – any Adobe app that supports ExtendScript can use this. More info here:

https://www.rorohiko.com/jsxgeturl

If all you want to get is an easy-to-use GetURL function for InDesign ExtendScript, I now have a simple installer to install ExtendExtendScript with the GetURL plug-in.

Version 1.0.4 was released on 16-Dec-2019 and supports InDesign 2020/macOS Catalina. This is a labor of love, and maintaining this tool is a substantial cost to Rorohiko. If this extension is useful to you, help us properly gauge how useful this is to you, and show us your level of interest and appreciation by donating via PayPal to [email protected]. If there is sufficient interest and appreciation, we’d be encouraged to keep on releasing updates!

Download it here: https://www.rorohiko.com/downloads/ExtendExtendScript.1.0.4.zip

Important: no warranties, neither expressed nor implied: use at your own risk.

You can find the source code and read more about ExtendExtendScript and how it works in some of my other posts: https://coppieters.nz/?p=133

If you’re not interested in how ExtendExtendScript works and all you want to do is access some URL from ExtendScript, this installer is for you.

The ExtendExtendScript extension is invisible. All it does is augment the InDesign ExtendScript environment with some new functions you can call.

It only works from a persistent ExtendScript engine; don’t run it from the ‘main’ engine, which is not persistent.

After installing this extension you can access a full-fledged HTTP/HTTPS downloader callable from ExtendScript, and you can write ExtendScript code like the following examples:

// Need to run in a persistent engine for callbacks to work
// Make sure to add JSInterface.jsx and json2.jsx

#targetengine TestSomewhere
#include "JSInterface.jsx"

function handleData(data) { 
 var fileURL = "~/Desktop/image.jpg";
 var file = new File(fileURL);
 file.encoding = "BINARY";
 file.open("w");
 file.write(data);
 file.close();
 alert("File downloaded to " + fileURL);
}

// Download an image file in ExtendScript over https
var url = "https://www.rorohiko.com/MagnetoGuides2-poster.jpg";

JSInterface.evalScript(
  "JSInterface.plugins.getURL(JSInterface.getData())", 
  url, 
  handleData);

Or

// Need to run in a persistent engine for callbacks to work
// Make sure to add JSInterface.jsx and json2.jsx

#targetengine TestSomewhere
#include "JSInterface.jsx"

// Some sample ExtendScript code. Fetch a URL over https and display 
// in an alert

function handleData(data) { 
 alert(data);
}

var url = "https://www.rorohiko.com/welcome.msg";

JSInterface.evalScript(
  "JSInterface.plugins.getURL(JSInterface.getData())", 
  url, 
  handleData);

This installer came about because I had built a more or less ‘standardized’ installer for installing the more recent software I wrote for Rorohiko. This installer does not rely on the ExManCmd command line tool, so it should be more robust. ExManCmd fails way too often, so I avoided using it.

And because I had the installer available anyway, I decided to roll off a copy just for ExtendExtendScript. Hope it proves useful!